GP-Simulator 2 SDR overview
To get started with the GP-Simulator 2 SDR, follow these steps:
- Connect the GP-Simulator 2 SDR to host computer.
- Install the drivers on the host computer.
- Optional: Connect additional equipment to GP-Simulator 2 SDR.
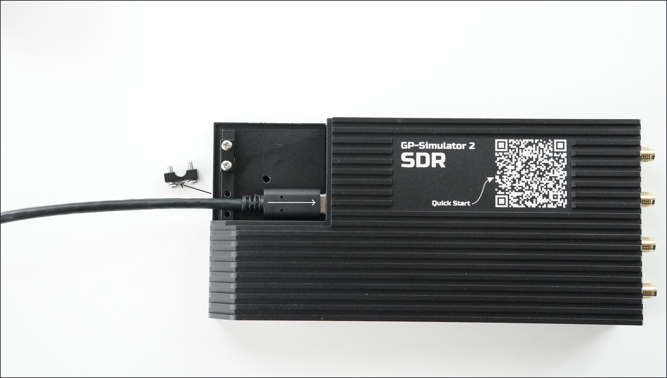
For an overview of the SDR’s connectors and indicators, see figure 1.
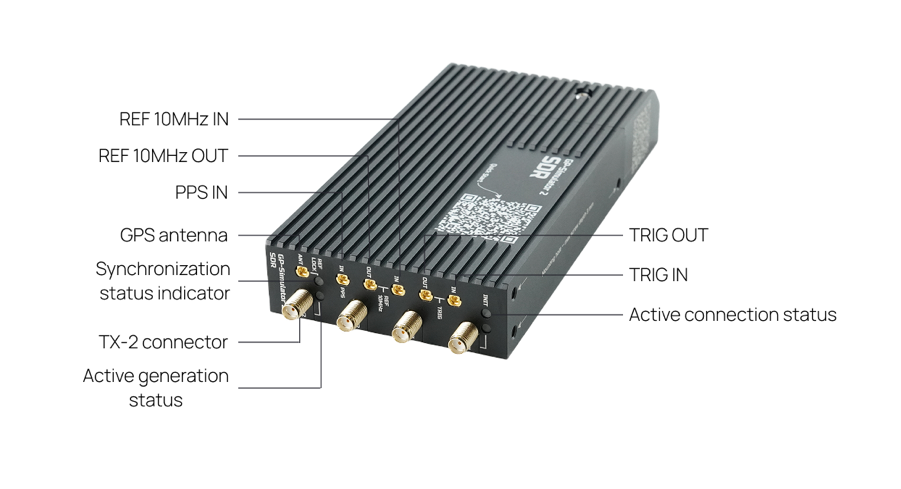
Figure 1. GP-Simulator SDR connectors and indicators.
Step 1: Connect the GP-Simulator 2 SDR to host computer
|
|
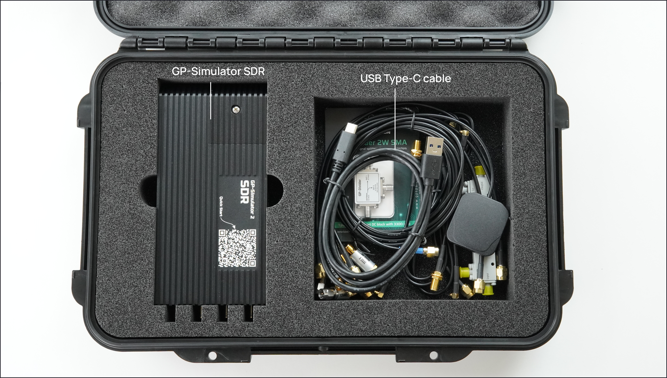
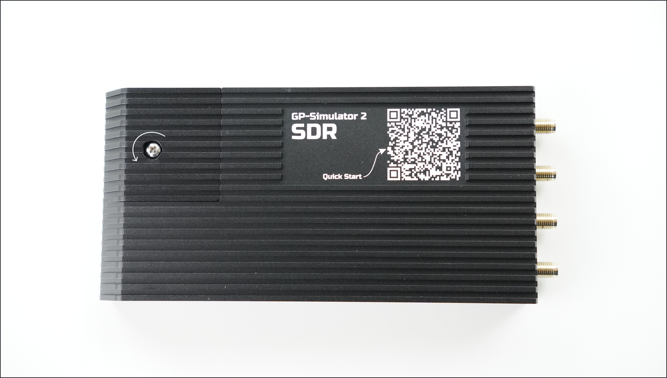
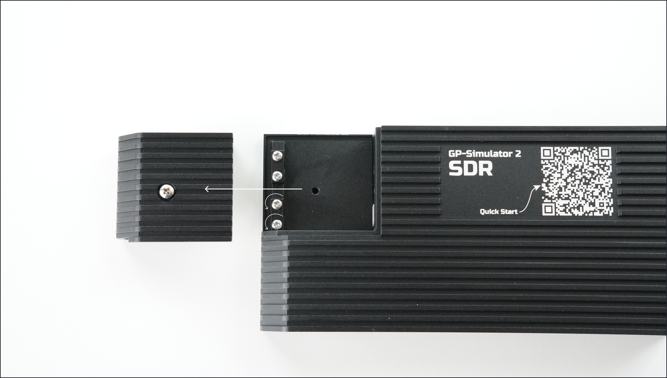
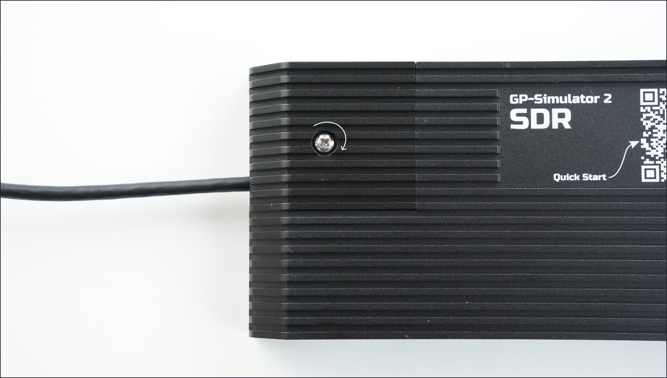
1.1 Open the protective case and locate the GP-Simulator SDR and the USB Type‑C cable. | 1.2 Unscrew the retaining screw and lift the cap from the SDR. |
|
|
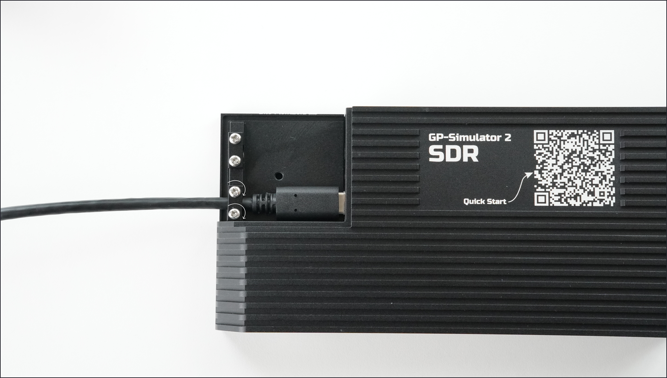
1.3 Loosen the two screws that hold the cable‑fixing clamp. | 1.4 Remove the cable‑fixing clamp and insert the Type‑C end of the cable. |
|
|
1.5 Secure the cable with the clamp and re‑tighten the screws. | 1.6 Replace the cap and fasten the retaining screw. |
1.7 Plug the USB end of the cable into the host computer. | |
Step 2: Install the drivers on the host computer
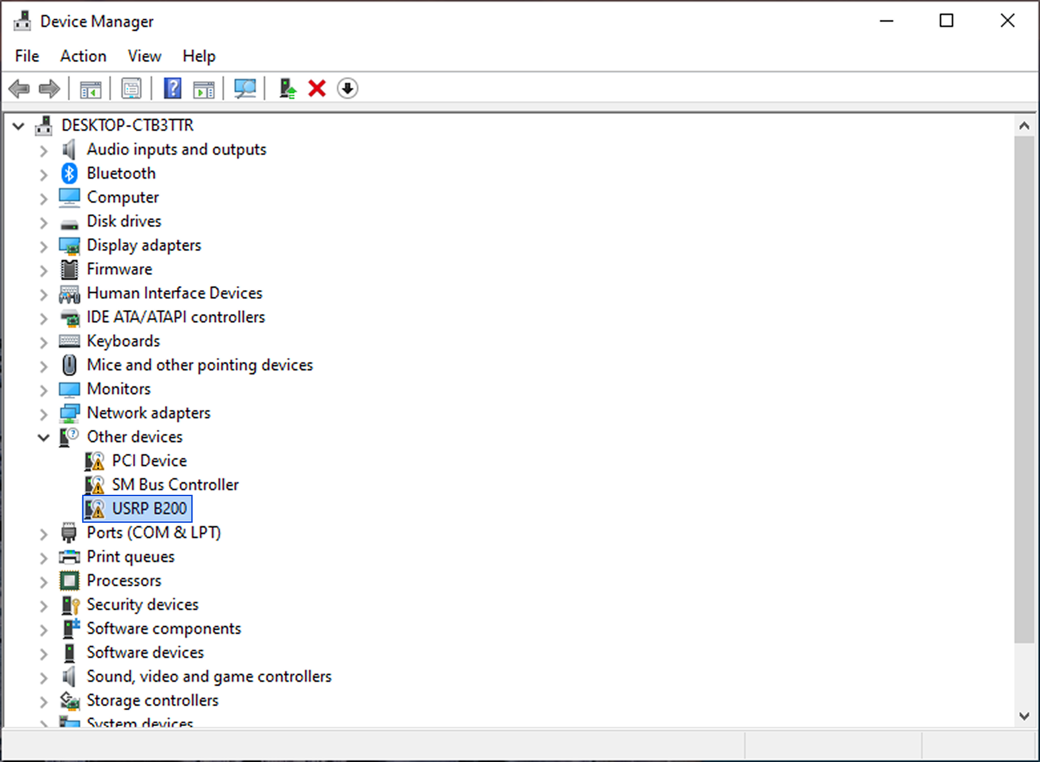
2.1 Open Device Manager and locate the USRP B200 device.
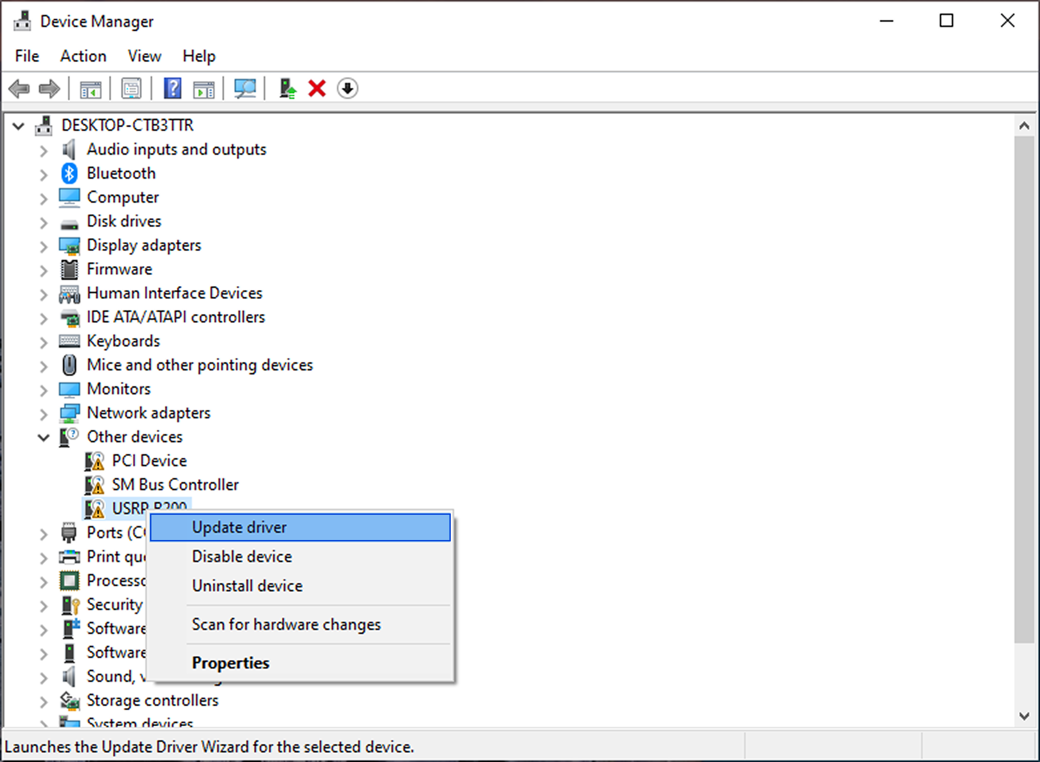
2.2 Right-click to select Update driver.
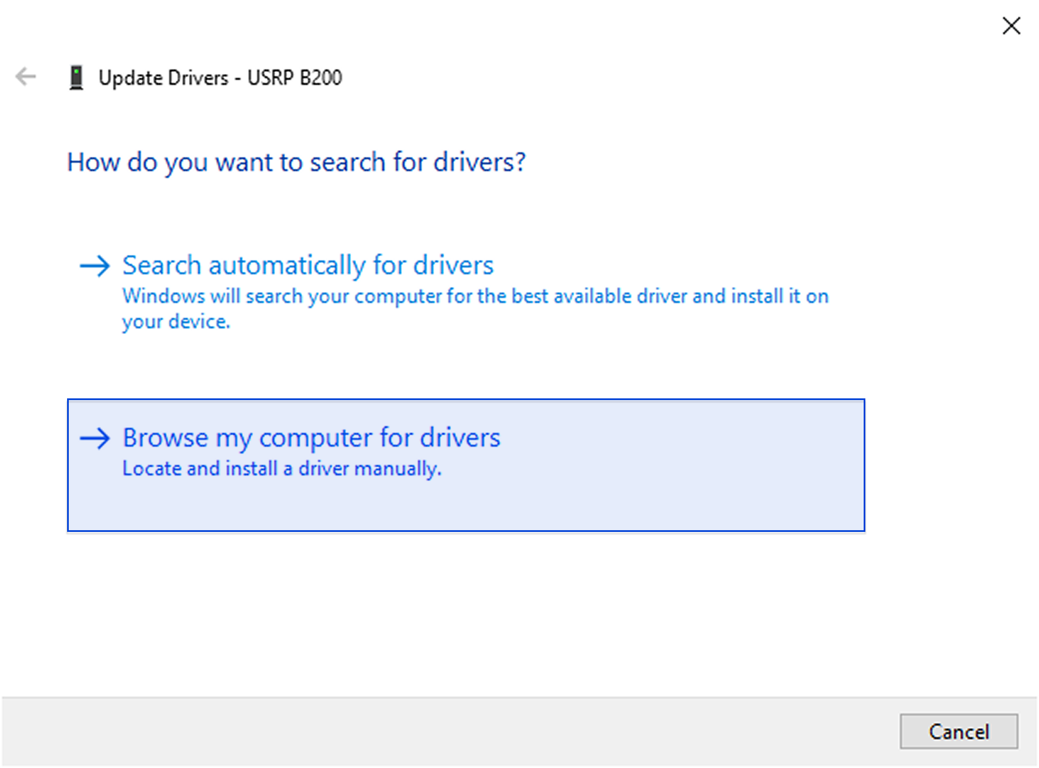
2.3 In the Update Drivers – USRP B200 dialog, select Browse my computer for drivers.
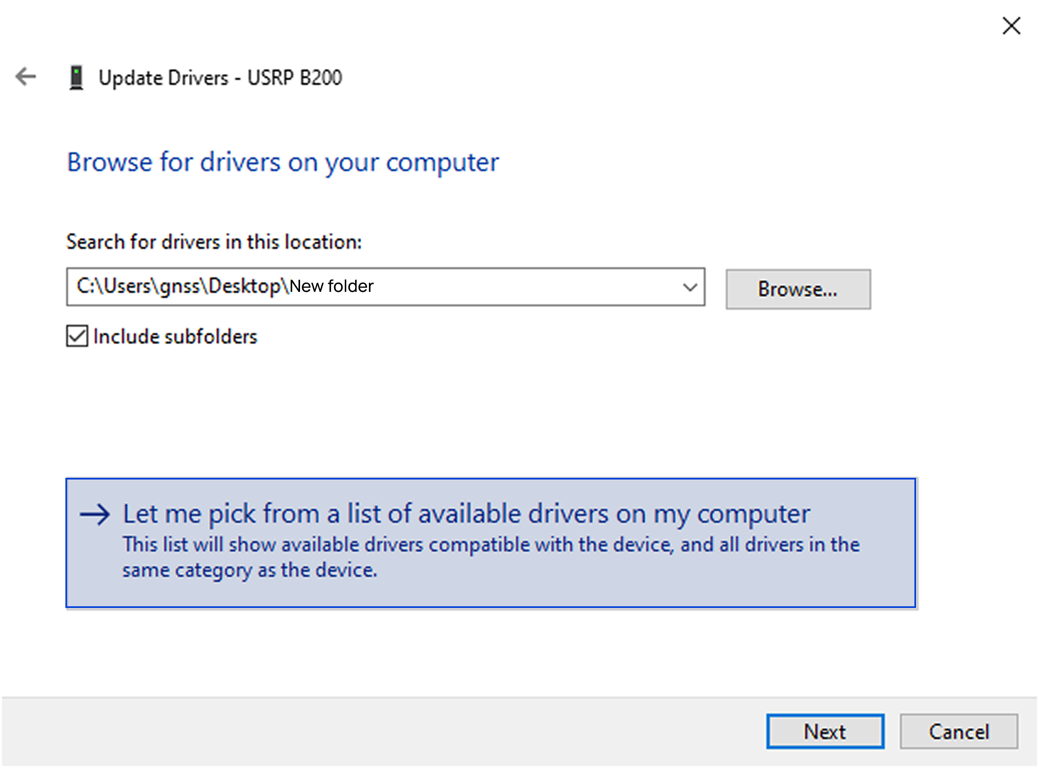
2.4 Select Let me pick from a list of available drivers on my computer.
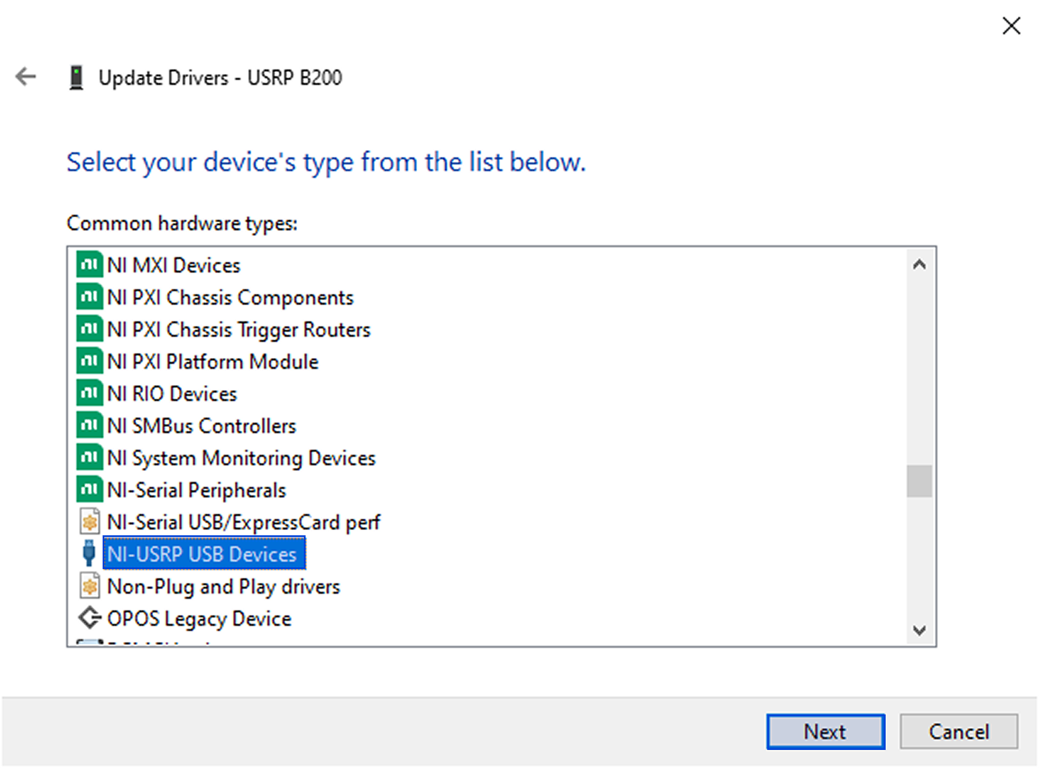
2.5 Select NI-USRP USB Devices and click Next.
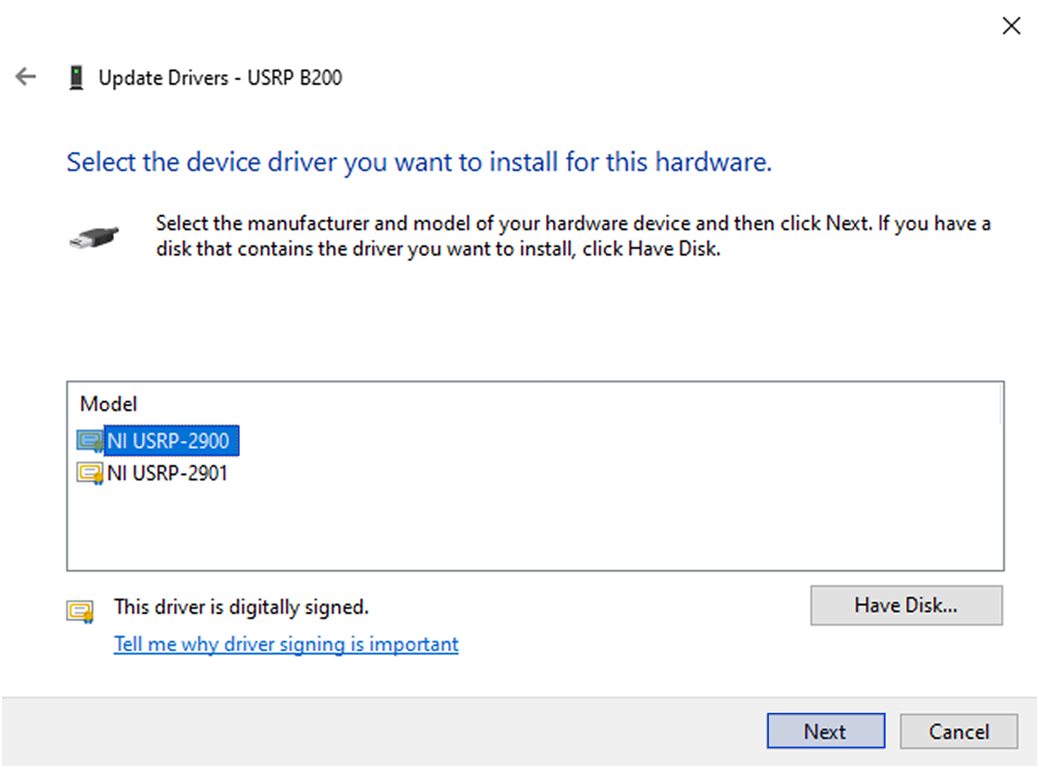
2.6 Select the device driver NI USRP-2900 and click Next.
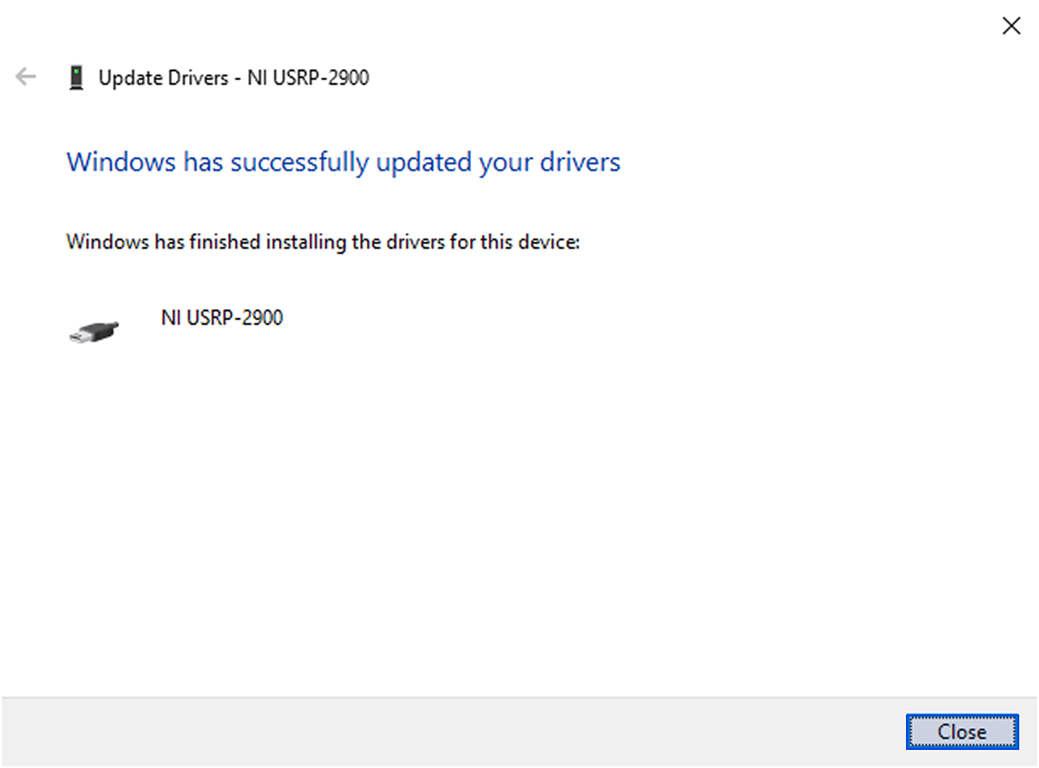
2.7 Drivers are updated, click Close.
Step 3 (Optional): Connect additional equipment to GP-Simulator 2 SDR
3.1 If you are using a GPSDO, connect the antenna to the ANT connector.
3.2 If you are using an external 10 MHz source and a 1 PPS source, connect them with SMA cables.
3.3 If you need to attenuate the signal, attach an attenuator.
Note: Connect the DC blocker to the receiver to protect the receiver.